
Bathroom Remodel Part. 1
- Drew Ratterman

- Feb 9, 2021
- 4 min read
Updated: Feb 9, 2021
In Anderson our homeowner has requested that we provide them with a complete remodel for their bathroom from the vanity to the tile and shower! Part one into our bathroom remodel starts with the vanity! The old vanity was clearly an out dated mid 90's era bathroom that needed some updates the previous contractor also made a mistake by placing the lights off center of the sinks. The first thing that we did is we updated the vanity lighting with two beautiful four light vanity lights. We decided that a five light vanity option would be too big for two fixtures together and a three light fixture would leave too much space in between. Since we were getting rid of the existing counter top we decided to have the fabricator, Ory's Granite located in Woodlawn, cut the sinks to center under our new vanity!
Old Vanity: Notice the Lights?

Prior to demolishing a vanity you must disconnect the plumbing. This is an incredibly important step if you don't want water all over the bathroom. Disconnecting plumbing is simple; first turn off the water valves and disconnect the supply lines. Supply lines will either be the braded hoses which are removed by unscrewing them or copper supply lines which are attached with a nut. If the vanity is old then expect corrosion and understand that you are going to have to work the copper supply lines harder; for us all we had to do was loosen both nuts and unscrew the supply line to loosen the corroded connection. It helps to purchase compression caps for the valves if you find they are leaking just wrap plumbers tape around the threads 2-3 times and tighten a compression cap with pliers or a wrench (we needed 3/8" caps). Also at this point disconnect the p-trap from the sink. This is done differently depending on how the p-trap was connected together; if the p-trap is connected with a slip joint then simply loosen the nut and slide it off, if the connection was glued i.e. "welded" on there or the connection won't loosen then remove the entire p-trap with a hacksaw, reciprocating saw, pvc cutter or wire saw. Once the trap is removed it is important that you make sure you plug the drain with a rag or plug as dangerous sewer gasses will come into your house if you don't (if you are worried that you won't notice if the plug or rag is working, don't worry your nose will tell you it is a very odorous gas.). Don't worry about the fixtures if you aren't reusing them just leave them attached to the counter.
Copper Supply line attached to water valve

Demo of a vanity top is not a complex task to do; simply remove the side backsplash with a pry bar (be mindful of the wall or cabinet that it is against) by gently prying it off and then look for any silica beads under the lip of the counter and if you see any cut it with a utility knife. Once done lift the counter up slowly to break the old silica beads used as adhesive. Once the counter is sitting freely on the vanity, lift the lip nearest you and tilt it in a way that the sink will go over the vanity doors and framing. In the event of the vanity being wedged between two walls carefully break the vanity in two in order to prevent the walls getting damaged, our walls were being repainted anyways so we were not as concerned about this. The existing counter was a faux 3/4" marble look counter top (very common in the 90's) and and was carried out of the room to be thrown away. A quick side note, take time to tape any wall mirrors in order to prevent them from shattering into a large amount of pieces. Finally remove any left over silicone adhesive from the wall as you will need a clean surface to attach your new backsplash; typically on drywall it can be peeled off with your fingers.
Old counter removed and ready for new install

Installation of the new vanity top and sink was completed by Ory's Granite and they did a fantastic job. The last thing left to do was to install the faucets and connect the p-trap. If you are not comfortable doing this then don't! Call a licensed plumber instead. The owner selected a beautiful Moen Voss 8 faucet that was chrome plated and easy to install by following the manufacturers instructions. Once completed the p-trap was hooked up using slip connections. It is imperative that the p-trap is level with the seal! The reason for this is that a p-trap works by holding some of the water that drains in the dip that makes a "p" and creating an airtight seal with water. If the seal is not level with the wastepipe, then too much water will siphon into the drain and not create an airtight seal which will allow sewer gas into the house through your sink drain (if you don't know what a siphon is then check out this great link: https://www.thisoldhouse.com/plumbing/22217954/how-does-a-siphon-work)
Proper vs. improper p-trap installation

New Plumbing
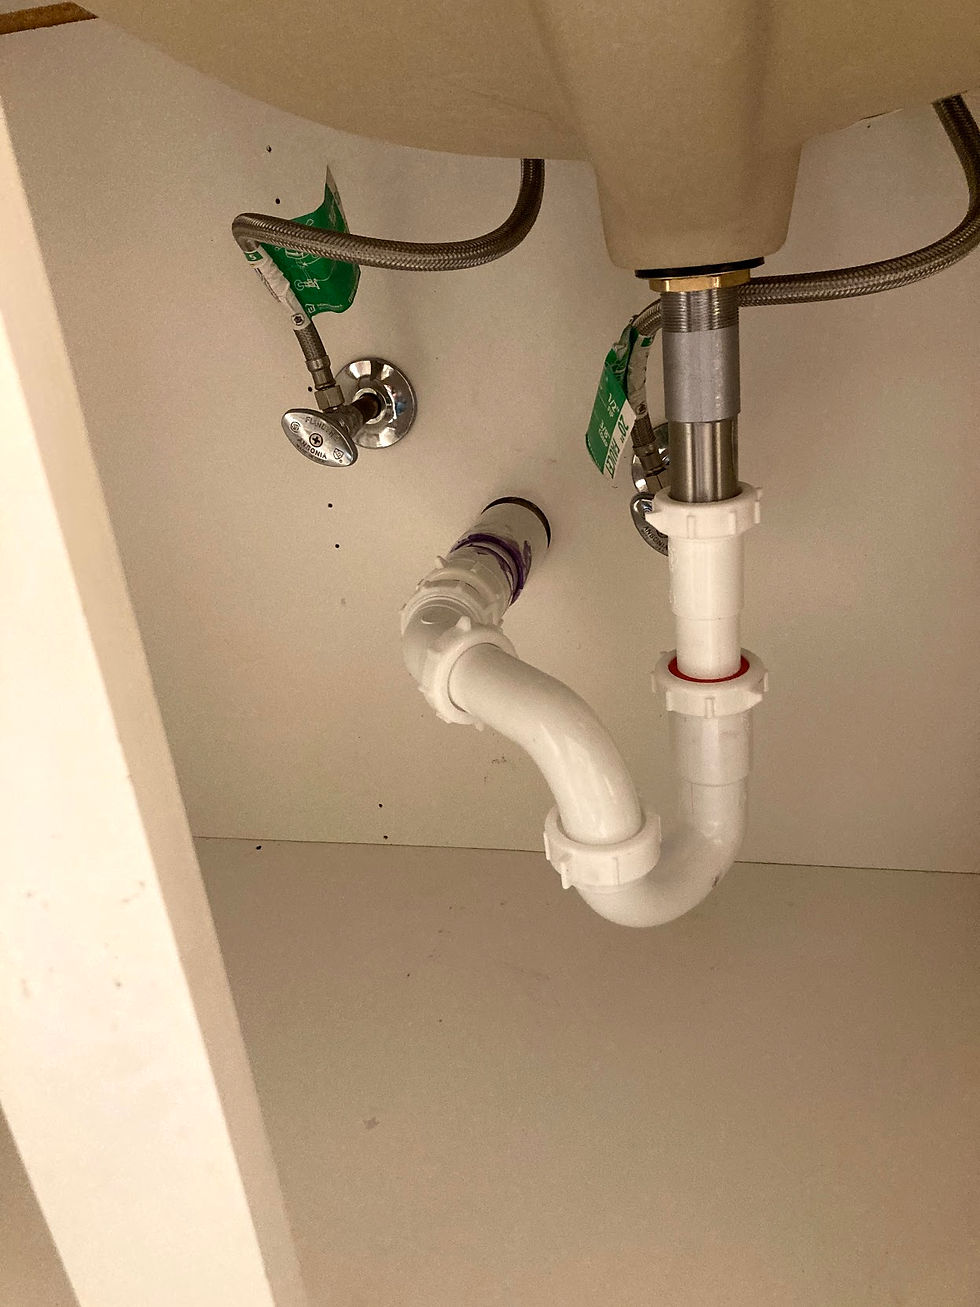
Since we moved the sinks we had to account for the plumbing being offset, we did this by using a 45 degree angle elbow to make the connection. Once plumbing was completed we tested the seals by running the faucets for 15 minutes to ensure no leaking. With that, the vanity part of the project minus painting and new vanity hardware, which will be completed later, was finished!
The finished product!


Looking for a bathroom, kitchen or basement remodel but don't want to do it yourself? Call DSR Builders today for a free estimate and consultation at 513-673-1569!


Comments